


Society6 Update
Our next update includes a big change for Society6. We can now work flexibly with your default merch design resolutions and make it possible to activate all Society6 products.
As many of you know, there is unfortunately no easy and efficient way to upscale images without sacrificing image quality. Therefore, we have come up with a way for you to activate products that require a high resolution without any effort. We have predefined several sizes that can cover all products. If the resolution of your original image is too small, we create a transparent area with the right dimensions and place your design in the center. Of course, this will only happen if your design does not exceed the resolutions of our preset sizes for an activated product. If the files you want to upload already have a higher resolution than our preset requirements, only your original files will be used.
This change allows you to use your standard t-shirt designs – most users use the dimensions 4500 x 5400 px – and still activate all products on Society6, which was unfortunately not possible before. Because of this change you should have a look at your Product Settings in LazyMerch and their Product Sizes. You can see how to do that below.
Admittedly, these changes sound more complicated than they are. I’ll explain it to you with an example.
Our original file has a resolution of 4500 x 5400 px. First we check which products now need a higher resolution and for which products our 4500 x 5400 px file will be converted to a different resolution.
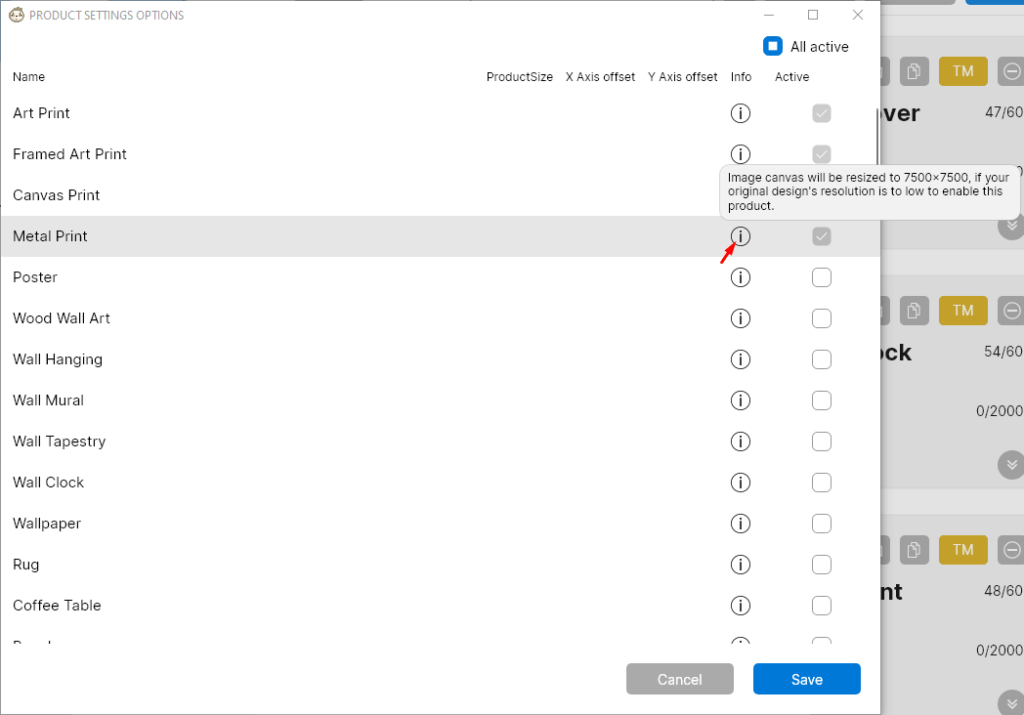
If you hover over the infopoint of a product in the Society6 Product Settings, you will see which resolution we will use for this product, if the design you imported does not exceed this resolution. In our case we have a 4500 x 5400 px file, which in the case of the Metal Print will now be placed in the center of a 7500 x 7500 px area.
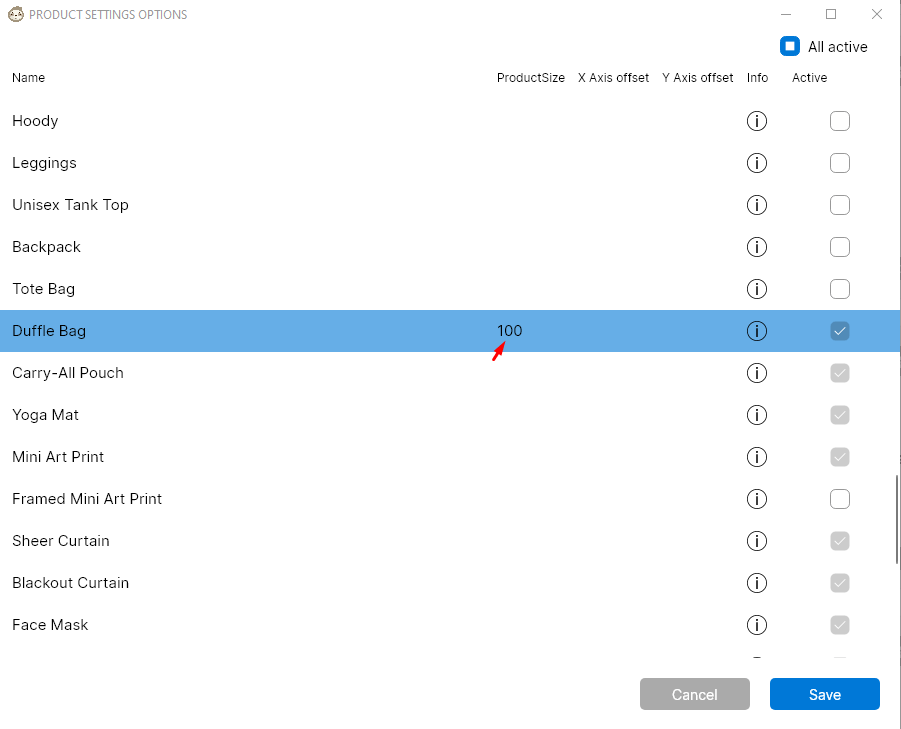
This new conversion method also allows us to enable products such as the Duffle Bag, which has a 14579 x 5700 px requirement. However, in order for the 15000 x 15000 px design we use for the Duffle Bag to look good on the product, we may need to adjust the Product Size in our settings. The best way to do this is as follows:
Find the Duffle Bag in the Product Settings and hover over the Info Point.

Now we know that a resolution of 15000 x 15000 px is used for the upload, if our design is smaller. With the 4500 x 5400 px it is smaller and so we check what Product Size the converted design should be on the product so it looks good.
The best way to do this is to visit the previewer section of LazyMerch. This is also a new feature which is explained here.
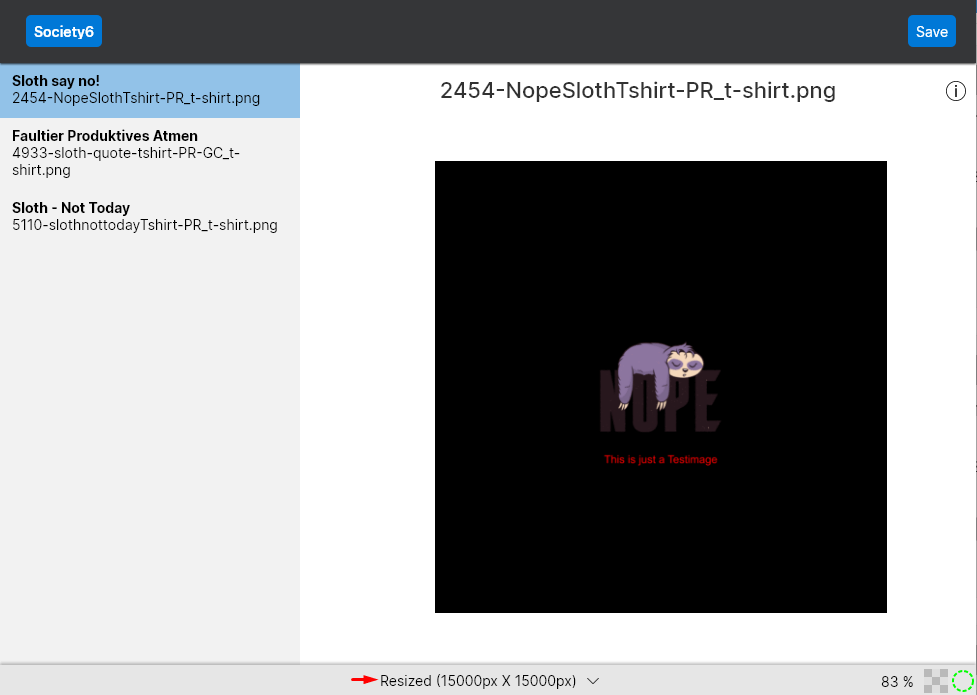
There you can select the option Resized 15000px x 15000px at the bottom of the corresponding image, so that a conversion preview is shown in the corresponding resolution.
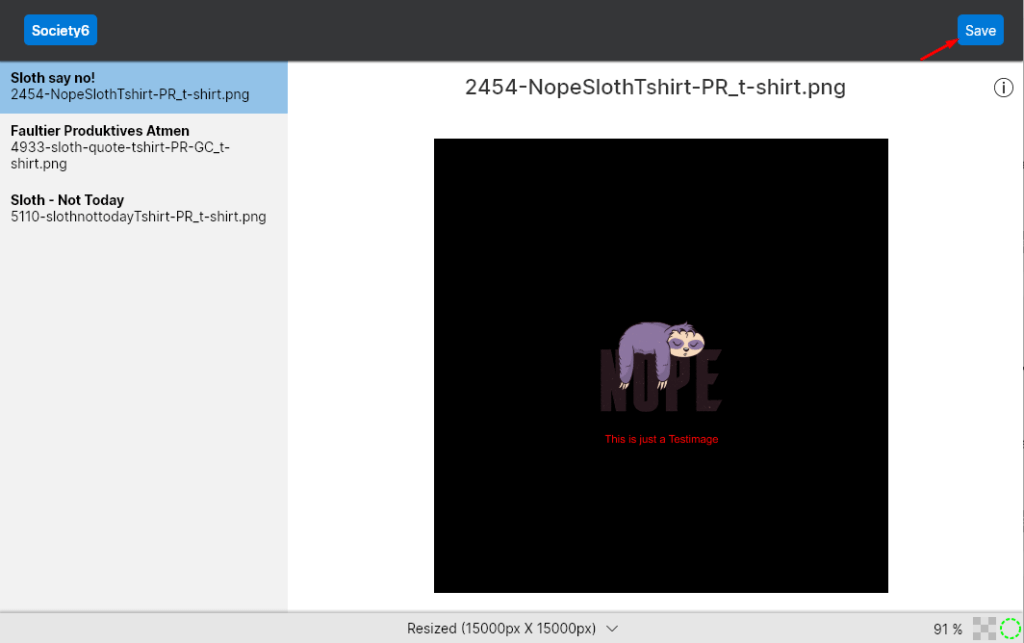
Now click on “Save” in the upper right corner and save the 15000 x 15000 px design to your device. Now you can check with Society6 how it should be positioned on the duffle bag.
Visit Society6 and upload this 15000 x 15000 design. The duffle bag can be activated and with a click on “Edit” you get to the adjustments of the duffle bag.
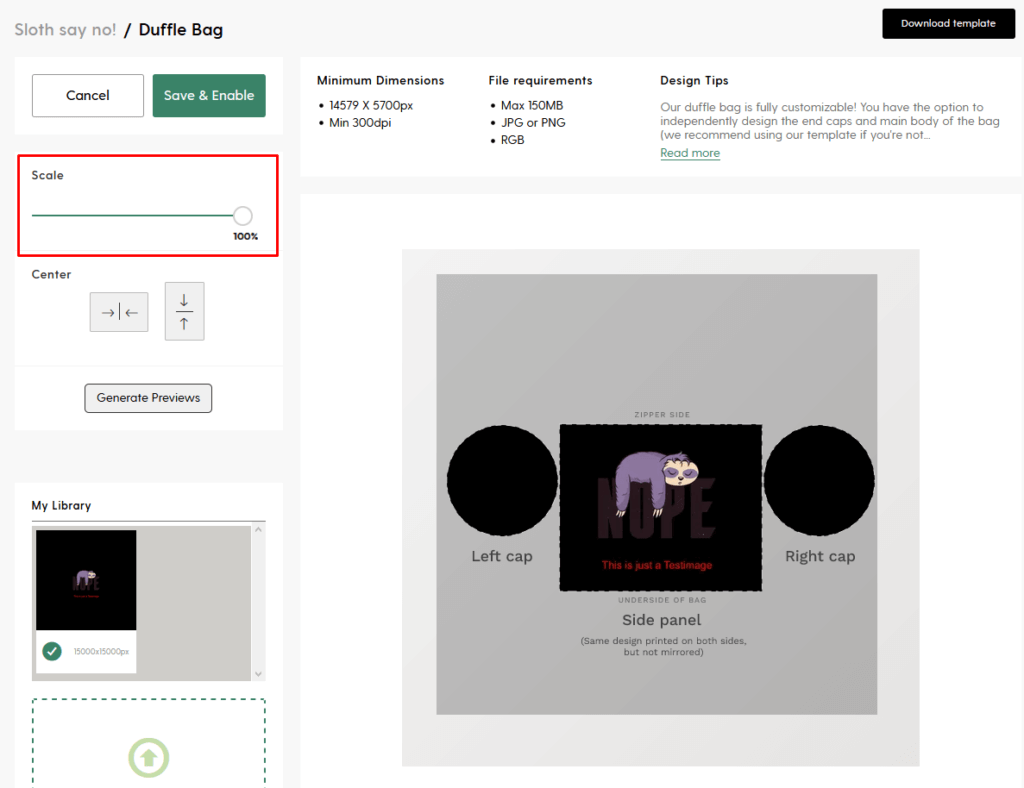
In our case the scale of 100% fits very well into the relevant print area, which we now also enter as Product Size in the Product Settings of LazyMerch.
We recommend you to check your Product Settings again and adjust them to your workflow. Through this new feature, one or the other product, which could not be activated before, could become interesting for you.

